
I Can't Believe My PC Can Be a Part-Time Steam Machine?!?
The Problem
We have a very comfortable couch with a very nice TV, but I am a PC gamer. Am I doomed to sit in a crappy desk chair forever to game? In order to slouch on the couch and game on my TV, do I have to give up on the PC hardware I paid so much money (😭) for?
Well no! TV PC Gaming is a thing. But how do I, you know? How do I make this work?

Initially I thought, well - what if I just built a new computer and run it under the TV? But computer parts are expensive and I'd be looking at at least 1500 bucks at the minimum to match my desktop and if I couldn't match my desktop, what was the point? I might as well just keep using my Steam Deck docked to the TV and I wanted desktop framerates and power.
I could just move my computer into the den with the TV but that would deprive me of the option of playing games at my desk and, well, some things are just better at the desk than on the couch with a keyboard in your lap: things like murdering kin–I mean–settling family disputes and typing enormously long blog entries.
Streaming tools (in-home streaming, Moonlight, etc) were an option, but they've always been hit-or-miss with me, there's input lag, video crunchiness, etc etc. I wanted all the frames that my computer could manage….just on my TV. If I was accepting a downgrade to make it work, well, I should just use the Steam Deck again. I'm told that options like Moonlight have gotten really good since the last time I tried, but I just wasn't particularly interested in accepting a downgrade.
The Tools
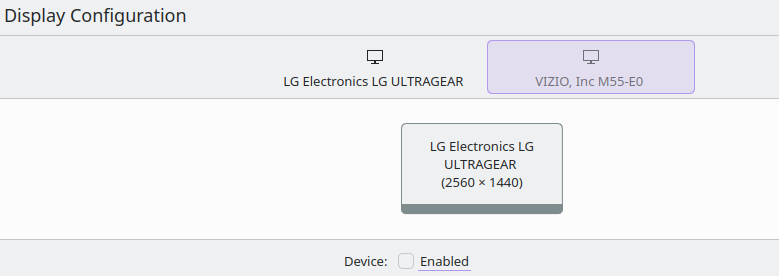
That's when my partners put in the leg work for me here to really get me over the hump. My girlfriend learned that HDMI cables have a max length of about 50' feet or so which is well under the distance from my desk to the TV. Simply run the cable between one of my GPU ports and one of the HDMI in on the TV and it works. My TV shows up as a secondary monitor in KDE's display settings. Easy.
USB was the trickier problem - cable length tops out at about 10 feet, which is several feet shy of me being able to sit comfortably on the couch. I generally game with a PS4 controller and could use bluetooth, but input lag was a concern and bluetooth gets….questionable sometimes when it goes through a wall. I could buy a 2.4ghz controller but I really like the PS4 controller and I had just spent a lot of effort to upgrade it to have a USB-C connector and didn't relish getting rid of it so quickly.
That's when my husband found this cromulent little device:

The EZCOO USB Extender. Basically you plug one end into your computer, put the other on the couch, and run a regular cat-5/6 cable between them. The one at the couch needs a power adapter (actually comes with one, wow, what a luxury nowadays) and now you can run USB devices into the other room. It is USB2.0 so you won't be doing any intensive file copying, but that's fine for keyboard/mouse and a controller.
As a nice bonus too, it appears to the computer as a USB hub (all the transmitting of USB traffic is handled inside the device), so there was no weirdness getting it to run in Linux. Just plug-and-play.
Is worth noting, though, that despite it being a USB2.0 device, a USB2 port isn't enough to power the gadget (the base station draws power from your computer) so it needs to be plugged into a USB3 port. That took me a whole day of frustrating troubleshooting–including learning how to sniff USB traffic–to learn. (If I had a dollar for everytime plugging a USB 2 or 3 device into the opposite port got me in trouble, I'd have two whole dollars.)
So now I had a signal to the TV. I had USB to the couch. I had a controller on the couch. I bought a crapppy Logitech keyboard with a built in touchpad so I even had mouse and keyboard on the couch (not good enough to play games on, but enough to use to tinker and run basic commands and control youtube so I could FINALLY watch Youtube videos on my TV with SponsorBlock).
Now I Needed To Make It Easy
I gamed for a few days using this setup but I quickly found it a little tedious to have to dip into the display settings to disable the monitor, enable the TV, switch the audio-out to use the HDMI cable (for the Bose soundbar we have at the TV). Blah blah blah i will literally spend five days figuring out a way to save 3 seconds.

Working on this project was right around the time I was starting to feel rather confident in scripting so I thought – "Wait a second. I use Linux. I can probably do something like this with a shell script."
The two things I wanted were for it to be
- One-button operation; I wanted to run it and by the time I got up from my desk and walked into the den, it was ready to go.
- Automated; I didn't want to have to rely on externally installed programs for things, I wanted as much as possible built into the script. Built-in DE tools were fine; having to install and configure an additional dependency was not.
See, in the past, I would have just thrown together some xrandr commands in a .sh file, slapped an executable bit on it and called it done but we live in the bright and brave new future of Wayland now, and xrandr doesn't work in Wayland. And true to Linuxy form, every single desktop environment and compositor has to run its own bespoke tool to replace it.
KDE uses kscreen-doctor. Not as slick a name as xrandr but, it works. As far as I know it only works on KDE (see what I mean?) and so if you use GNOME or Hyprland or something else, you'll have to figure out how to configure this in whatever you run.
# List connected output devices
kscreen-doctor -o

# Disable monitor on DisplayPort 2. Enable TV on HDMI-A-2 and set it to primary.
# Some games don't like it if your primary monitor isn't active.
kscreen-doctor output.DP-2.disable output.HDMI-A-2.enable output.HDMI-A-2.primary

# Disable the TV and return output to monitor
kscreen-doctor output.DP-2.enable output.DP-2.primary output.HDMI-A-2.disable
Next we needed to switch output to HDMI. pactl does the trick there. This one will work in any distro which runs PipeWire/PulseAudio. Just change out the device to whatever yours is.
# set default output sink to hdmi. note that its identifier is different from the way that kscreen-doctor identifies it.
# Check the pactl docs to identify the one on your machine.
pactl set-default-sink alsa_output.pci-0000_2d_00.1.hdmi-stereo-extra3

# Switching audio back to headset or desktop speakers seems unnecessary.
# Simply de-activating the HDMI output in kscreen-doctor will also deactivate the
# equivalent HDMI audio out and Pipewire/PulseAudio will just jump back to
# whatever the previous default sink was.
As an additional thing, I've noticed, is that if you immediately enable the output to the TV and then immediately switch the audio output, it will not work. At least, that's how it is on my TV (a Vizio M55-E0). So I put a
sleep 5between the two commands. That does the trick.
Finally, we needed to add some logic to it to handle automated switching and we have our base script. I use fish-shell, so bash/zsh users will have to convert the syntax to something that works for them.
#!/bin/fish
# Check if we are on TV mode. Output results of kscreen-doctor to json format,
# pipe it to jq to search for whether or not output is on the TV.
# Stores it in variable $areWeTV
set areWeTV $(kscreen-doctor -j | jq -r '.outputs[] | contains({"name":"HDMI-A-2", "enabled":true})' | grep true)
# If we are on TV mode, switch back to desktop mode
if test $areWeTV = "true"
kscreen-doctor output.DP-2.enable output.DP-2.primary output.HDMI-A-2.disable
# Kill the systemd-inhibitor
kill -9 $(pidof caffeine)
# If we aren't on TV-mode, then go to TV mode
else
kscreen-doctor output.DP-2.disable output.HDMI-A-2.enable output.HDMI-A-2.primary
sleep 5
pactl set-default-sink alsa_output.pci-0000_2d_00.1.hdmi-stereo-extra3
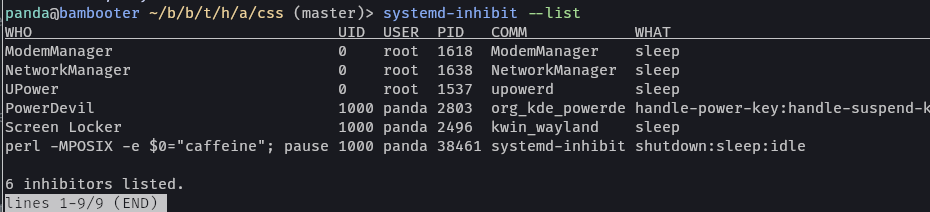
# Start the systemd-inhibitor, hook it to dummy process
systemd-inhibit --what shutdown:sleep:idle perl -MPOSIX -e '$0="caffeine"; pause' &
#run steam. will focus window if it's already running.
steam -steamos3 --big-picture
endThat's the script. It'll toggle between TV and monitor everytime you run it.
Power Management
The commands that deal with systemd-inhibit and a process called caffeine solve an additional problem that I ran into as I continued to use this script to game. I like to play long JRPGs and sometimes you can go several minutes in cutscenes where you don't have to input anything into the game. I also sometimes get up and go AFK for long periods of time while I game – to use the bathroom or make food or just because I'm distracted.
Nothing sucks more than to be in the middle of an emotional cutscene only for the screen to lock. Or to step away from the computer for 20 minutes only for it to go to sleep and the game to crash on wake.
KDE lets you disable some of that through the use of its Activities feature whcih seems neat, but it seems a system designed primarily for using in a GUI and I really didn't want to learn a whole new command syntax for this for a feature that seemed like I was going to use almost exclusively for this project. Plus, it was a betrayal of the second design principle: I wanted everything inside the script and having to interact with a GUI wasn't inside the script. In addition, I know I'd constantly forget to re-enable it on switching back to my desktop.
I tried to sniff the dbus in order to see what dbus commands were firing when triggering power settings in KDE's menu but that just seemed like a lot of work as well as it seemed like everything you clicked on triggered a dozen dbus messages.
I knew of systemd-inhibit, but it has a drawback of not letting you control power globally - that is, letting you disable them until you turn it back on. It's meant to be a wrapper around a long, unattended process that you don't want power management to screw up.
I could have put systemd-inhibit into the launch options for every Steam game I ran but ahaha no. So instead I found a bit of perl code that runs a program, calls it 'caffeine', and then pauses it. Literally all it does; uses no CPU time and all of like 4mb of memory. That command gets fired when switching to the TV and is the process that systemd-inhibit is going to run on to inhibit power management.
As long as the 'caffeine' process is in memory, systemd-inhibit is blocking access to shutdown, idle, and sleep functionality. So naturally, when switching back to the monitor (when I want power management back), it gets the PID of 'caffeine' and kills it. Not exactly as sleek or as neat as controlling it with dbus or using an external program but it's two lines and works fine and sometimes the janky, fun solutions are the best. It tickles some part of my brain and that's enough for me.
Steam
I don't know the full story of how Wayland handles inputs between various programs but from what I understand: despite the crazy amount of work that Valve has done to make Linux gaming as great as it is, the Steam client on Desktop is….weird.
Basically the command in the script will run steam (or focus it if it is running). Will activate big-picture mode (the tenfoot/controller interface). The -steamos3 flag is, I don't know. I believe it launches Steam with some special compatibility code that's part of how steam works so well on the Steam Deck. Without that code, a controller cannot interact with games running in gamescope compositors (more on that in a bit). So basically you trick Steam into thinking it's running on the Steam Deck hardware and then controllers just work through some kind of weird back-end magic.
So there. I had a script, it was a run-and-done solution.
But It Could Be Made EASIER
Okay, so we're basically there right? I have a single script I can run to apply all the settings I want and then reverse it. But are we? Are we really?

I want it to be a button. Running a script on the desktop (even if it's pinned somewhere to my KDE taskbar) isn't a button.
Enter: my budding interest in electronics and microcontrollers. I felt like this was a perfectly great project to start with to learn. With the advice of the best sister a girl could ask for, I picked up a Raspberry Pi Pico 2W starting kit and a guide book. I used the book's starter projects as a starting point (I've never been one who learns much from following lessons in order but rather, who starts with a basic template and builds from there through trial-and-error).
This was the end-result. It is written in micropython.
import machine
import time
import network
import rp2
import requests

#front matter
#wifi setup
rp2.country = ("US")
ssid = <<wifi ssid>>
psk = <<wifi password>>

#setup the hardware
wlan = network.WLAN(network.STA_IF)
wlan.active(True)
wlan.connect(ssid, psk)
button = machine.Pin(15, machine.Pin.IN, machine.Pin.PULL_UP)
led = machine.Pin(14, machine.Pin.OUT)

# try and get network connection, slow blink while searching
max_wait = 10
while max_wait > 0:
    if wlan.status() < 0 or wlan.status() >= 3:
        break
    max_wait -= 1
    print("Waiting for network connection...")
    led.toggle()
    time.sleep(1)
    led.toggle()
    time.sleep(1)

# connection failed, rapid blink while failed
if wlan.status() != 3:
    print("Network connection failed.")
    while True:
        led.toggle()
        time.sleep(0.2)
        led.toggle()
        time.sleep(0.2)

# connection successful, print ifconfig (for debug purposes), steady led indicator
else:
    print("Connected to network.")
    led.value(1)
    print(wlan.ifconfig())

# make the button do; calls to a server running in flask on my desktop
while True:
    if button.value() == 0:
        response = requests.get("http://192.168.x.x:5000")
        print(response.content)
        response.close()
        time.sleep(5)
The build itself is very, very simple - just a button and an LED used for signaling status. It is still on the breadboard because I haven't figured out yet what the final shape of the project will be (something at my desk? a remote at the couch? something attached to a wall near the den's light switch?)
But it works.

And then finally, the code for the Flask webserver is, itself, very simple:
from flask import Flask
import subprocess

app = Flask(__name__)

@app.route("/")
def hello_world():
	subprocess.run(["output-switch.sh"])
	return "mode switched"
And so the Pi Pico does a simple HTTP request to <my-desktop's-lan-ip> at port 5000 and Flask runs the request.
I mean, really you can't get much more simpler than that.
If you run Fedora (or any distro with firewalld), remember to allow port 5000.
Issues and Next Steps
- Occasionally I have white-line flickering on my desktop when returning from TV-mode. It goes away on reboot. I need to upgrade to Fedora 42 before I start troubleshooting further. It's a minor annoyance and largely ignorable.
- My TV supports the Consumer Electronics Control signalling standard via HDMI but my GPU does not (I don't think any do). This means that if the TV is off when I trigger the script, the process hangs until the TV is turned on. This isn't causing any issues but in the spirit of 1-button operation I've ordered a CEC signaling adaptor. Once that arrives I'll incorporate the correct signals into the script so that it can turn on my TV (and soundbar) and switch to the correct input.
- Gamescope is a microcompositor developed by Valve. It's one of the reasons the Steam Deck manages windows as a computer as well as it does. It also can be run on top of a full-fledged Wayland compositor to allow you to control video output settings independently of your display. The most useful aspect of that is to enable HDR. For now, I use
scopebuddy(link) to manage the settings to enable HDR and VRR on my TV and disable them when I'm at my desktop since I don't like the HDR effect when doing desktop things. I know an external dependency violates the design principles but I'm tired and i wanna play video games - Finishing the remote switch and putting it in a proper enclosure.
Uhm. That's basically it. Here's a gif.
